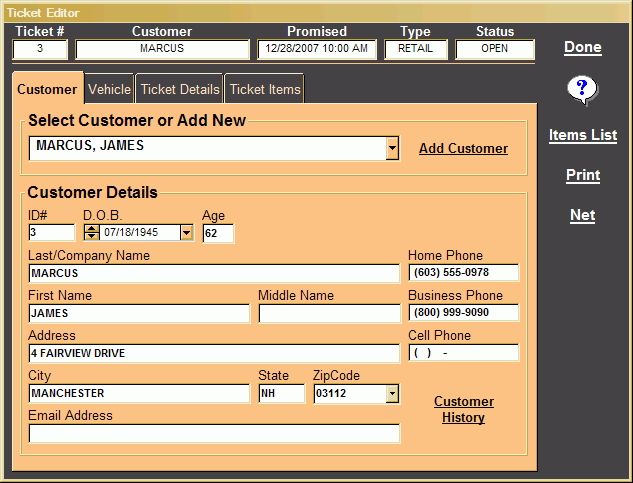
The Customer tab is used to indicate the customer associated with retail tickets. Internals are automatically billed to your sales department. When working with the Customer tab it is always best to check the customer selector drop down to see if the individual is already in the list. Customers only need to be added once and checking the list before adding new records will prevent duplications.

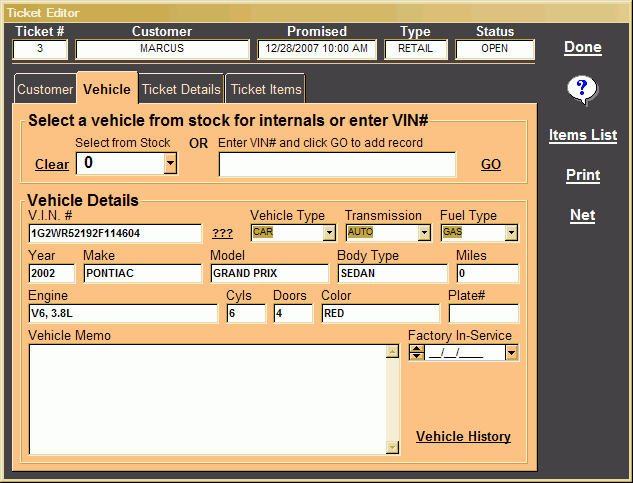
On the Vehicle tab you can either select an in-stock vehicle for internal tickets or enter a vin and click "GO" for retail tickets. When you click the GO button the system will look through all your previously recorded vehicle records and try to locate a match. If no match is found then most of the vehicle data will automatically be decoded from the vin number.

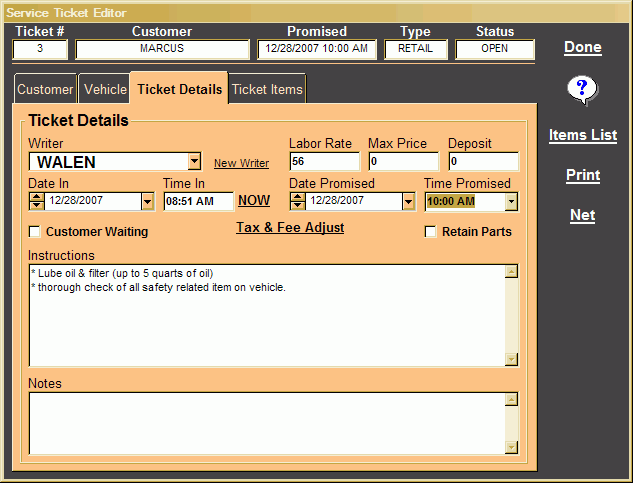
Use the Ticket Details tab to specify the service writer and various other details about the ticket.

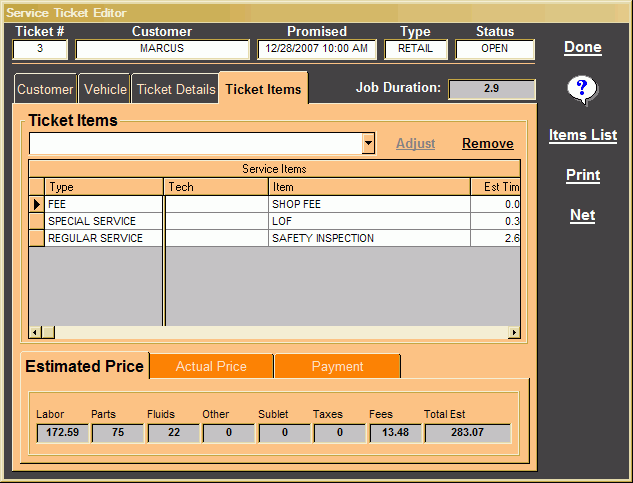
The Ticket Items tab is where you will indicate the work being performed. Use the Ticket Items drop down to choose various ticket line items. If you can't find an item in the list you can click the "Items List" button to the right to add new ones. See Ticket Menu Items for more info on adding new items.
As you select ticket items they are added to the Service Items grid and the estimated times and pricing is displayed at the bottom of the screen on the Estimated Price tab. Click the "Adjust" button to update the actual times on non-flat rate ticket items. the adjusted times and prices are tracked on the "Actual Price" tab. When you are ready to close out a ticket go to the "Payment" sub tab and fill in the "Received" box to zero out the balance. The system will automatically change the status to CLOSED when the balance equals zero.
Tickets can be one of four different Statuses.
- OPEN - all new tickets start out as OPEN.
- COMPLETED - you can change the status to COMPLETED when you need to reprint a ticket with actual times instead of Estimated times.
- CLOSED - tickets that are paid in full will automatically changed to CLOSED status. Optionally you may also manually change to this status which can be handy for Internals.
- HOLD - this status is used for tickets that a customer has not commited to, or if you have a ticket that you are having trouble collecting on.


